Note – Timeline is now available for all. To Activate goto https://www.facebook.com/about/timeline and click ‘Get Timeline“, it will instantly get activated on your profile.
Facebook Timeline is a new layout which is totally different from previous visualization interface. Currently the Facebook timeline is only available to those who have Developer accounts on Facebook. Few days back, Facebook made changes like top-stories, real-time ticker which shows all the updates from your friends in real-time. With real time ticker you can easily view the updates from friends on just a mouse over and on the same page itself, no need to even press a button or to go to any other page. Because Ticker shows the details of any update in a pop-out box on the same page.
You may like: Get Rid Of Unwanted Facebook Features / Notifications
Now Facebook Timeline is fully optimized with beautiful layout as it appears in the image below –
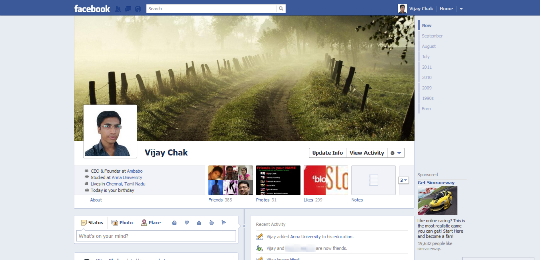
The new Facebook timeline access is limited for users, though if you have simple idea on how to make your profile as Facebook Timeline profile then you can easily activate your profile to timeline.
Procedure to Enable Facebook Timeline on your Profile –
To get access to timeline profile, you just need to logged in to your Facebook profile and need to enable your account with developer status.
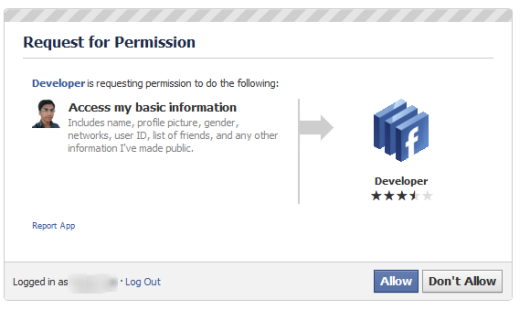
1. To do so, search for the “developer” app and allow or enable the app as you do normally while using other applications, Just click on “Allow” button. (Or goto http://www.facebook.com/developers/)
Note: You need to have a verified account on Facebook in order to create an application with the developer app. Know more about how to verify facebook account.
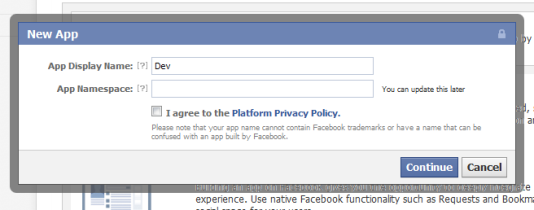
2. Once you changed to the developer mode, then go to the App page to create a new app. In that you need to enter a name, namespace and the description as your own.
Namespace for the app needs to be unique. However you can give any name to the app because it will be limited to you only. Once you have successfully created an application you need to visit the app page again.
3. Next you need to click the “Open Graph” header, this is because you need to define the action that people can do when they use your app. This is not important, though you need to do it to activate your timeline profile. Once you entered the action, click on “Get Started”.
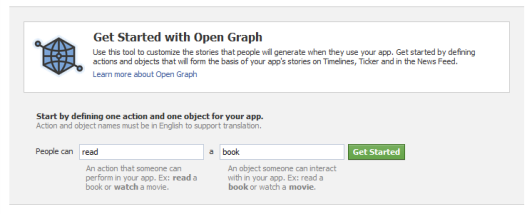
4. Now simple scroll down at the bottom of the page and click on save changes & next (Do this for all the pages, no need to make any change).
5. You now need to wait for a couple of minutes, then visit your Facebook profile.
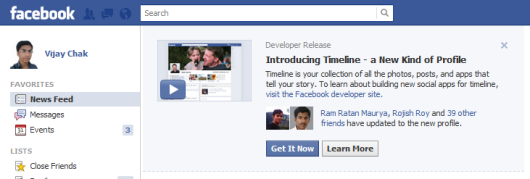
6. Next you would see an invite to get started with timeline on your Facebook header, if not wait for some minutes and visit homepage again.
7. Accept the invite then you can see your profile commuted to the new Facebook Timeline profile.
As said earlier, currently this is limited to developer accounts. So only those who are already on timeline profile with developer account will be able to view your new timeline profile. And the normal users will still see your old profile. But soon in near future, we hope that it will be rolling out to all Facebook users.
Video Screencast on How to Enable & Activate Facebook Timeline:
httpv://www.youtube.com/watch?v=oediDnLzC24


